Uploading Real Estate Photos The Right Way
Showcasing your listings well is critical to your success, and different media takes in different formats of photos. Here’s a definitive guide to understanding the ratios, how photos are cropped, and how to best prepare for multiple media outlets.
Some of Brixwork’s custom designed websites have specific photo ratios on certain sections for graphic effect – often we use 16:9, or 2:1 panorama photos for a the Cinematic Intro effect. Instagram prefers square photos, while many MLS® systems are designed for traditional 4:3 ratio photos.
Portrait Photos
TALLER than they are WIDE – that is the definition of portrait photos. Often used for interior shots or personal photography, as well as on social media stories to fit the vertical screens of iPhones & Androids.

Image sourced from Vancouver Realtor® Sue Scott of Royal Lepage
Landscape Photos
WIDER than they are TALL – that is the definition of landscape photos. Often used in home photography, as well as scenic shots where a wider viewpoint is preferred.

Image sourced from Neacsu Denner’s West Vancouver Listing at Ross Crescent, Cypress
Common Landscape Photo Ratios (from narrower to wider)
Relative Ratios, Not Pixels
Note: these numbers show relative width to height, so larger numbers such as 16:9 doesn’t mean a larger photo than 2:1. In fact, the 2:1 is a much wider landscape photo than the 16:9, since 16 is not quite double of 9.

When Photo Ratios Need to Change
Our real estate websites are often designed for a tailored look & feel which means many pages require photos of a very specific photo ratio for a polished look. Stretching photos is a big no-no since it distorts the content, and is considered very ugly & unprofessional. Cropping to the new ratio is the best option, but with some limitations!
Try It On Your Real Estate Website!
If you learn better by doing, rather than visual examples below, go for it – most Brixwork real estate websites are equipped with specific lead image dimensions for your own listings. If you don’t specify, it falls back (in most cases) to the first photo gallery item. Instructions on how to upload & crop the lead image for listings can be found on our support centre.
When The Target Ratio is Taller Than The Original
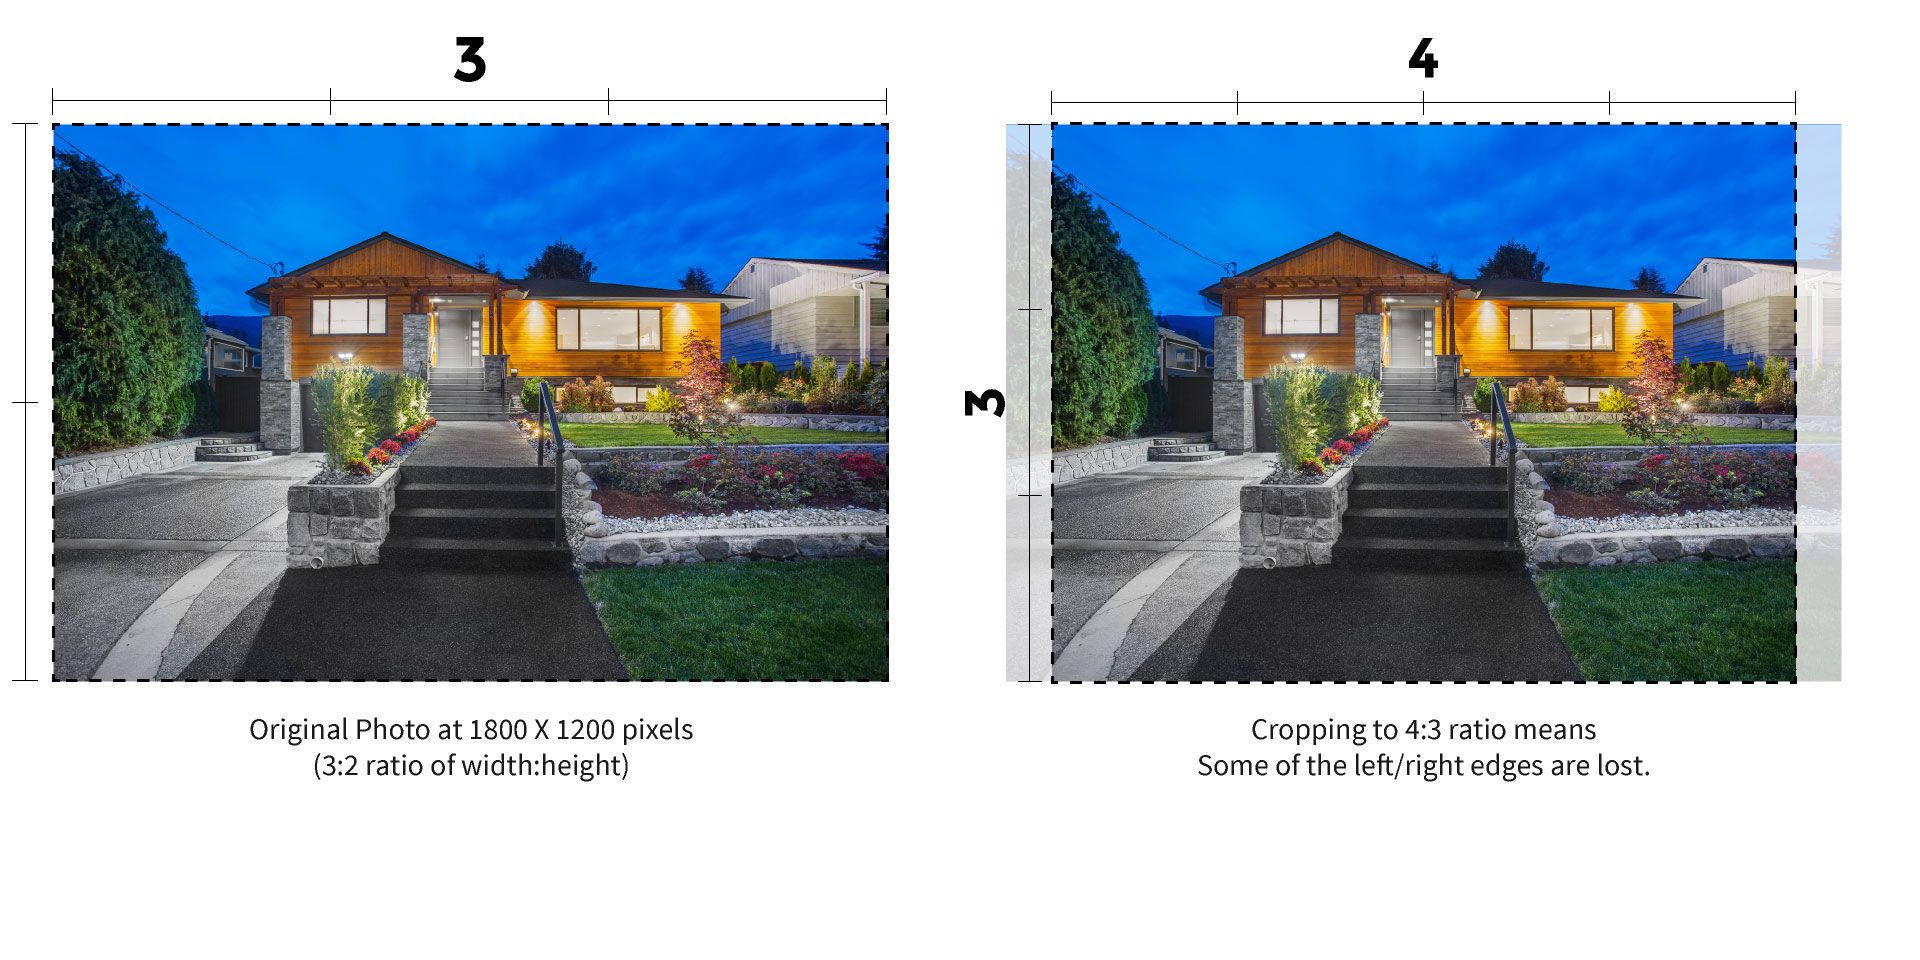
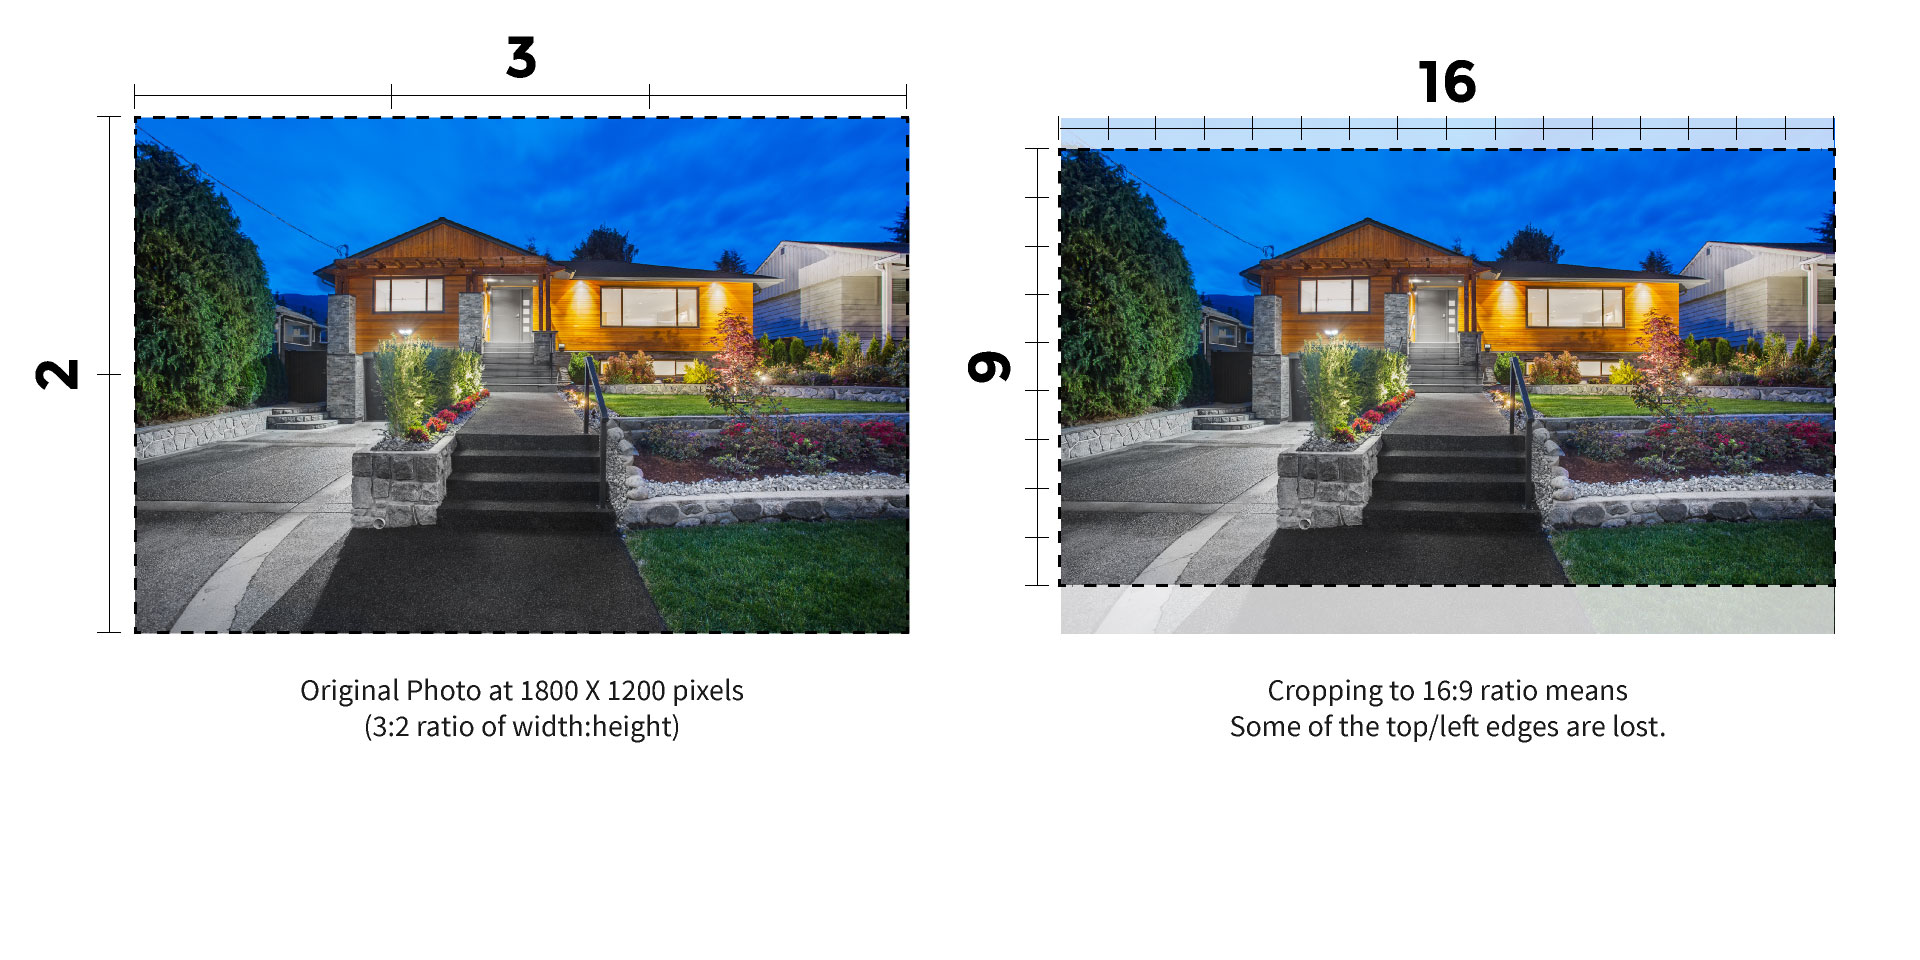
Some photographers tend to provide very wide panoramas at 16:9 ratios, whereas many applications will require a more conservative photo ratio. In these cases, you will lose some of the left/right edges of the photo. (click image to enlarge)
When The Target Ratio is Wider Than The Original
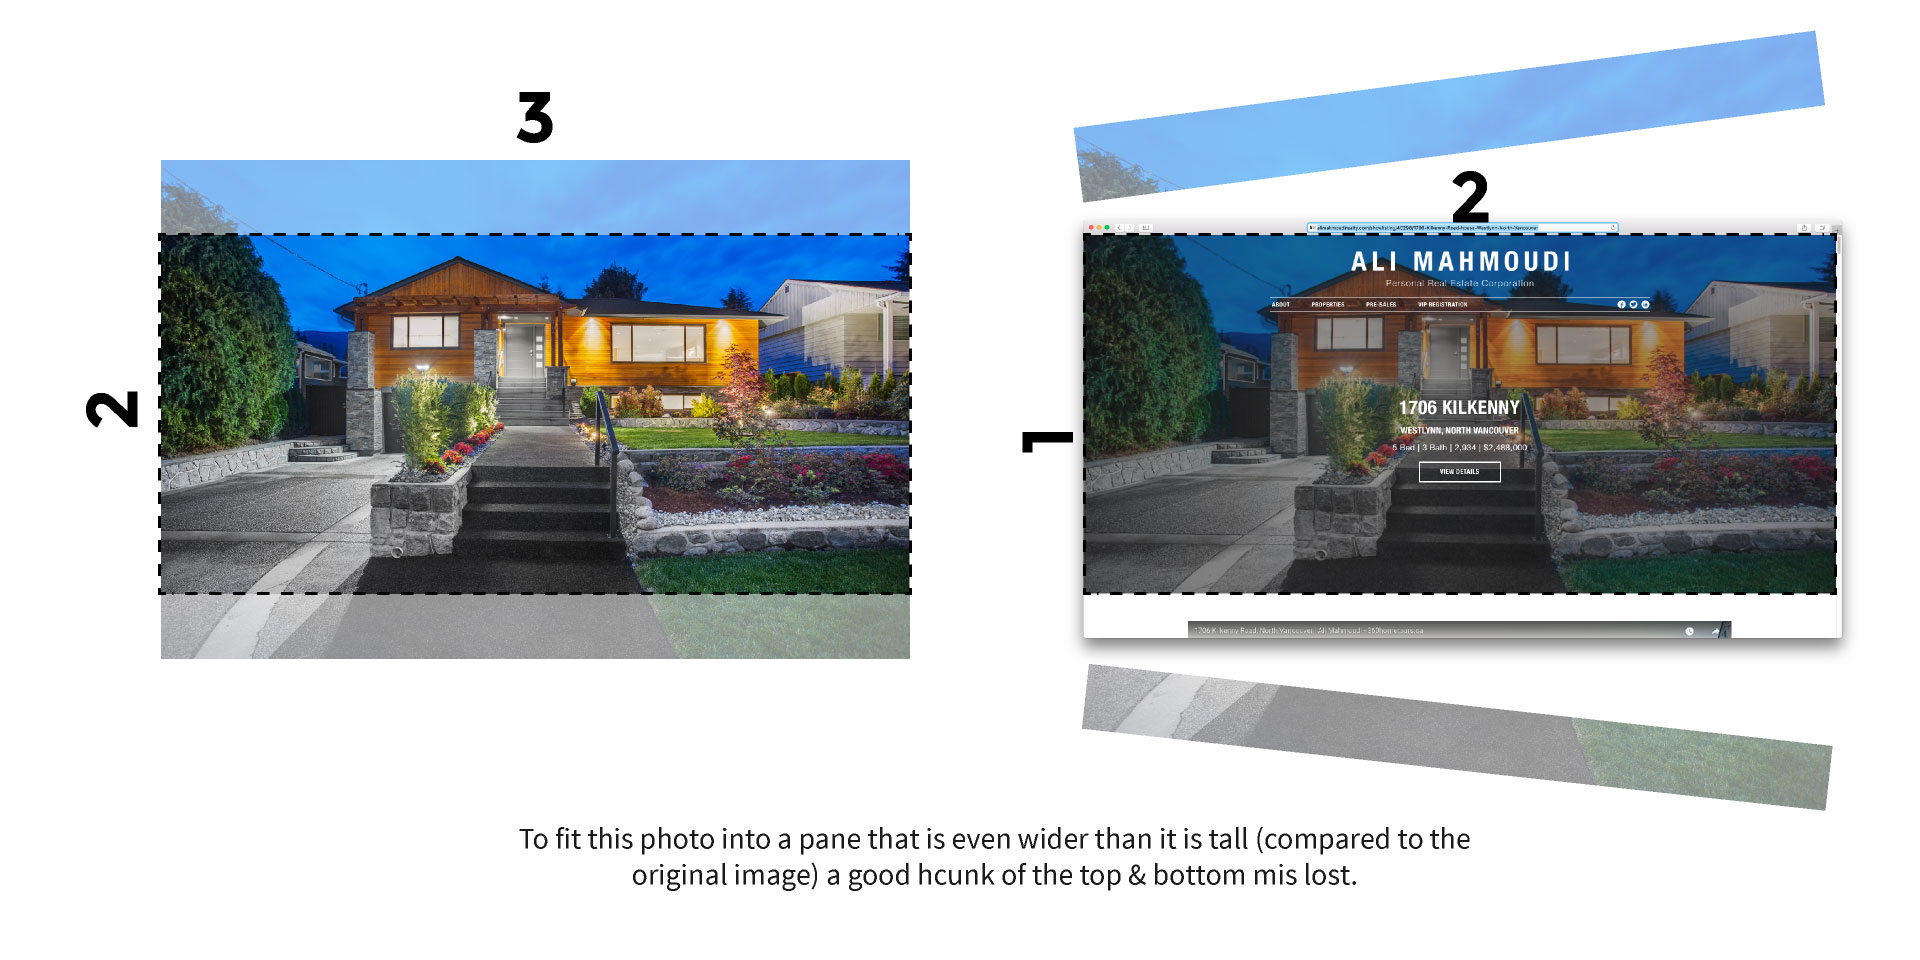
If the media requires an ultra-wide photo compared to your original pictures that are closer to a square, you will lose some of the top and bottom of the photo. (click image to enlarge)
A Real Life Example Of A Photo Crop
In this example of Ali Mahmoudi’s North Vancouver listing, the top of the listing detail page requires a very wide photo – at a 2:1 ratio. The original photography was provided at a 3:2 ratio which is much taller than what the frame needs.
In this example the top & bottom is cut out to fit the custom designed listing detail page’s specifications.
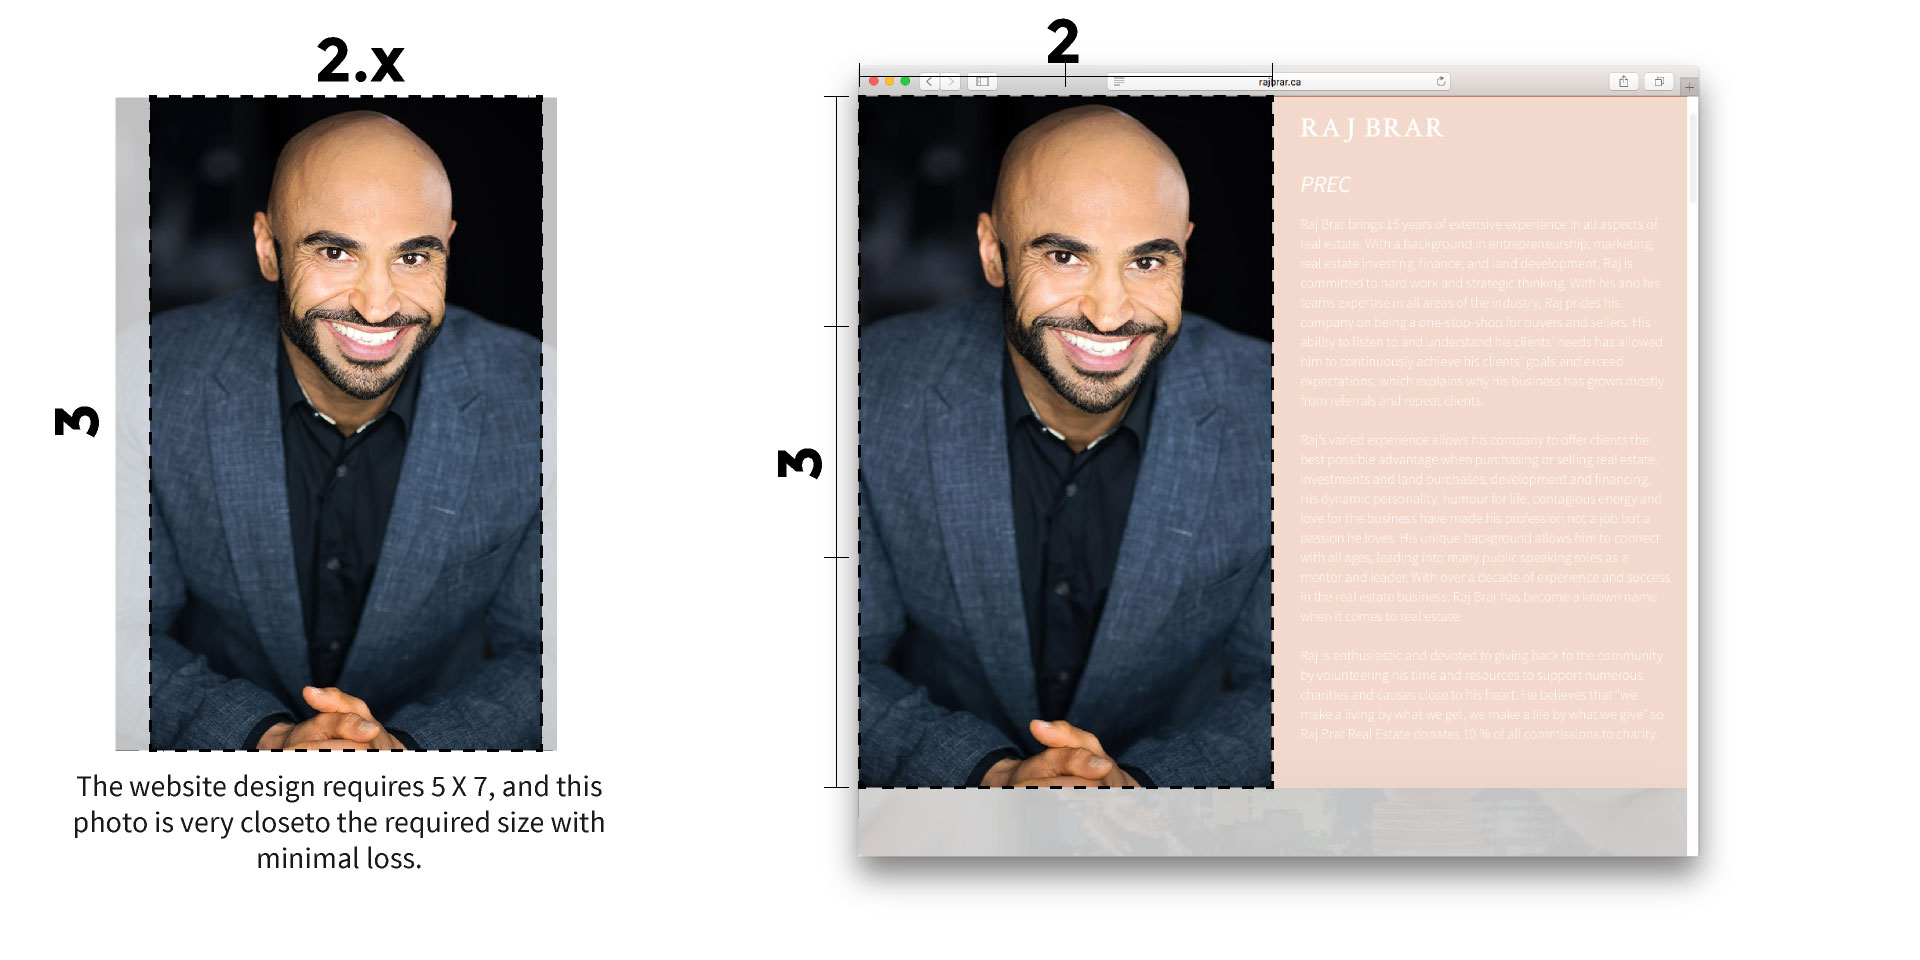
Portrait Photos For Realtor® Bios
Raj Brar (White Rock & South Surrey Realtor)’s biography page has a portrait photo section. The designed ratio was 2:3, while his original photo was slightly wider, for a 2.x : 3, roughly.
In this sample you can see that with a bit of clipping on the left/right edges, the photo fits in nicely.
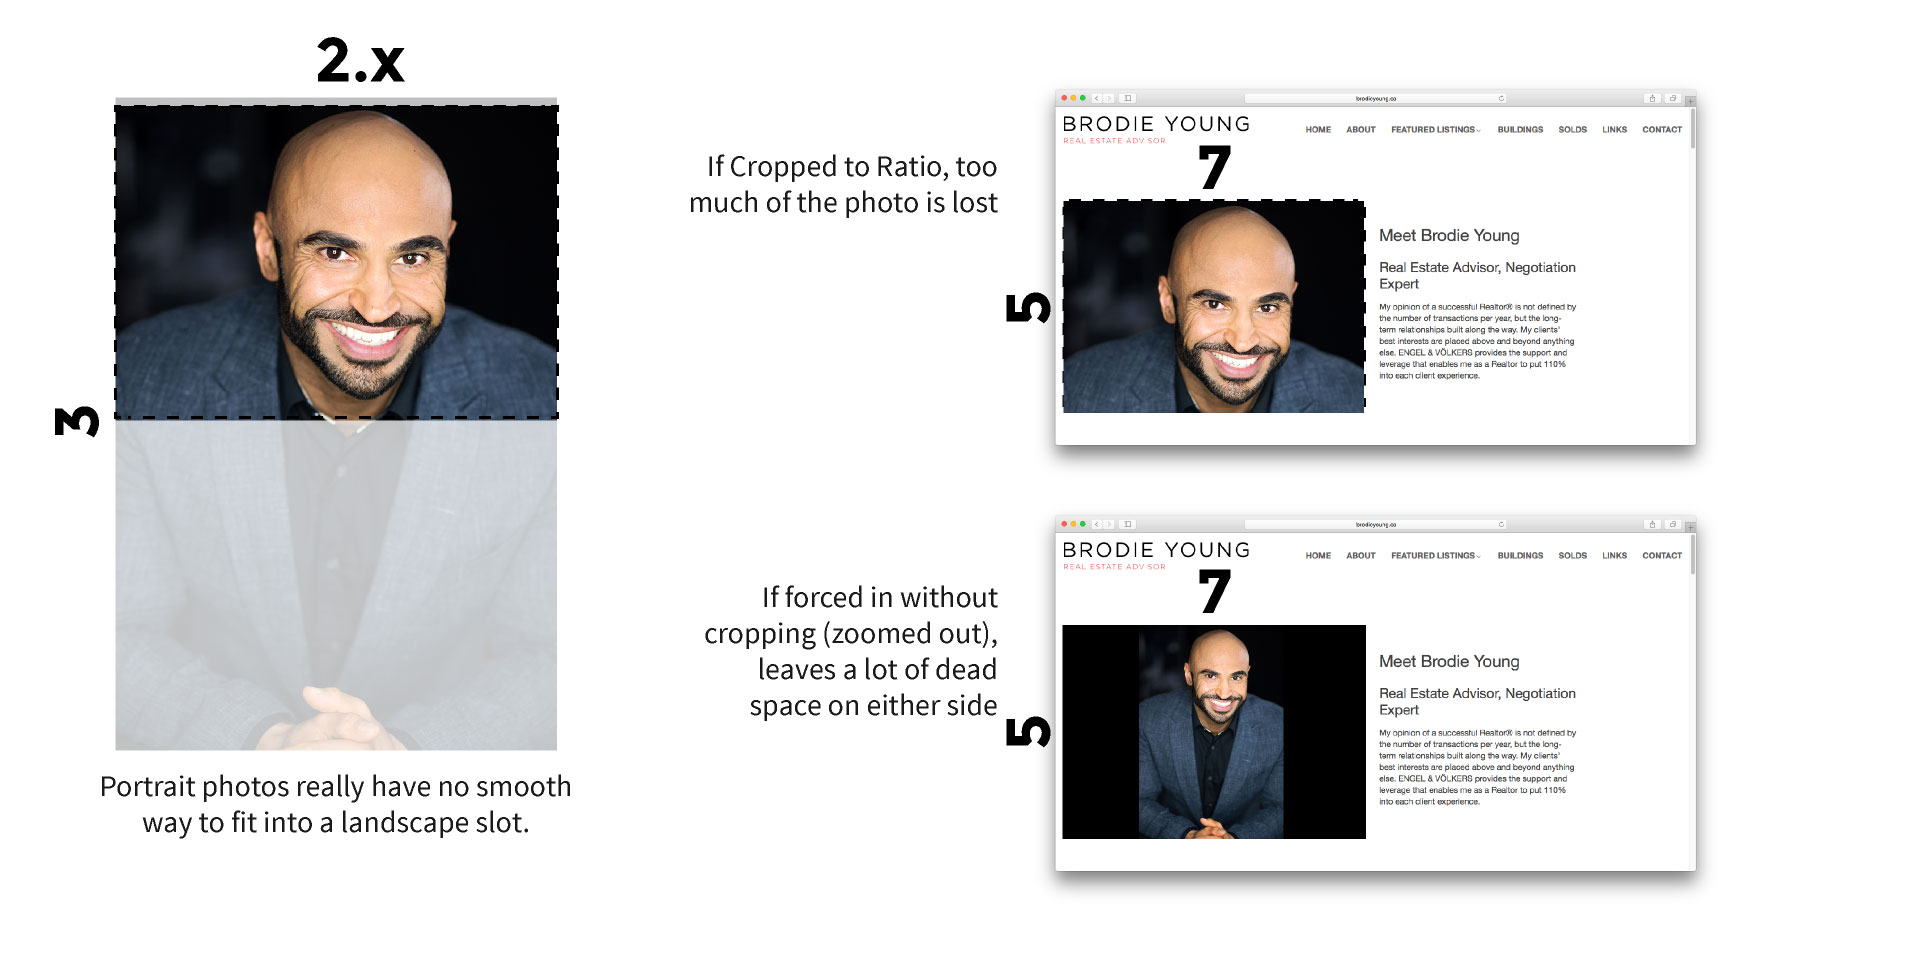
Portrait Shots do NOT Fit in Landscape
Brodie Young (Vancouver Realtor®)’s biography page however features a 7:5 landscape photo for his biography section. With a design such as this, Raj’s photo that is portrait, would not look good any way you place it.
If cropped, too much of the top & bottom is lost, resulting in a very awkward look without the torso. If not cropped, it leaves too much dead space on the left/right while the photo appears too small.